Happy October everyone! The leaves are falling and there's that crisp scent of winter lurking in the air. Ah, it sure is beautiful! And you know what else is beautiful? Diodes and trimpots, of course. Check out these gorgeous new components: 3.4V Zener Diode 5.1V Zener Diode 1k Single-Turn Trimpot w/ Knob 10k Single-Turn Trimpot […]
Rainbow Brite Dress Project
Solar botics
May 7, 2015
Cosplay at Solarbotics
We have a bit of a rule here. If there's a project we want to do, somebody has to have the passion for it. The drive, the dedication, the "kick-the-right-people-in-the-butt-to-get-it-done" drive. In this case, the project is a Rainbow Brite Dress, as spear-headed by our warehouse chief-elf Lyn Janelle (costume concept, design and modeling). She dragged R&D pixel-pusher Dan Damron (electronics and programming) to assist. The finished project made it's brilliant appearance at the Calgary Comic & Entertainment Expo, receiving many positive reviews.
Here's what Lyn and Dan said about their respective parts of the project:
Lyn: How I became Rainbow Brite
We all have characters we grew up with that we adore and for me, Rainbow Brite was one of them. I admired her positivity, her charm and of course her COLOUR. So it's not a great surprise that I wanted to cosplay her. Not one to ever do things simply, I didn't just want to sew a costume like I usually do, I wanted to delve into the world of electronic wearables (I'm also a crazy raver, so the more glow the better) and build the brightest glowing costume possible, and Rainbow Brite seemed like the perfect vehicle for what seems like an unreasonable amount of glow.
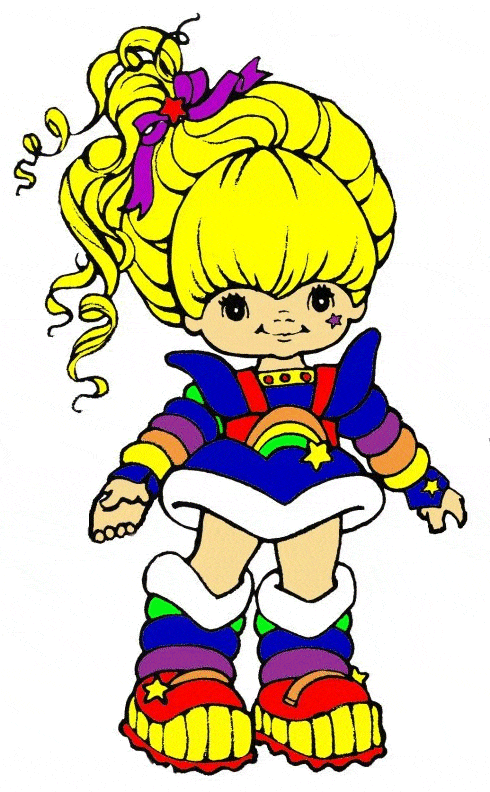
So this is the image I took inspiration from as its my favorite and the one I grew up with.
I merged it a bit with the one below as I wanted to make my version a little more adult.

I designed my pattern and built the dress in what I felt was a nice combination of the original concept and a slight update for comfort.
The boots were one of the most entertaining builds I've done. As anyone who knows the character will tell you, she has enormous boots, so I had to think outside of the box. I used a cheap pair of slip-on sneakers, and some sheets of packing foam and proceeded to glue it to the shoe to create this wonderful moon boot silhouette. The ankle joint was a little tricky, as the foam didn't have a lot of flex to it but I didn't want to rip all my hard work with the first step. I decided to glue on fabric joints on each side of my ankles so that the sleeve of the boot was kept firmly in place but still had enough give to rock back and forth with each step. To give the boot a more finished look and have a place to anchor the LEDs to I covered the whole foam boot with black broadcloth.

Then came the tough part. Other than some basic wiring and a brief encounter with soldering, I have never done this kind of work before, but I had the wonderful R&D team at Solarbotics to walk me through it. They taught me some basic principles, how to install the LEDs in the correct fashion (I seriously had no idea the led strips were directional: live and learn!), I got an update on how to solder, joint relief, why using the correct coloured wire is so important and so many more details!
After the LEDs were stitched in place, wired and checked, the programming started. Dan (he's the newest member of our team, welcome to Solarbotics Dan!) took point on this project and began programming the various lighting modes and animations for the project. This was a huge amount of work, and he did it brilliantly, especially since we were down to the wire (many puns intended) and the Comic Expo was right around the corner.
Here is the video the boot running rainbow animation:
I took the dress home to do the last few details. I needed to finish boot covers, shoulder covers and a hem cover. The purpose of these is to diffuse the light in the effort to give it a seamless glow where all the colours blend instead of tiny points of colour. Also, it hides the guts of the project and provides some protection to the components.
Early Saturday morning I arrive at the Expo for my shift, some final hand sewing and to do the final test run before I put the costume. We set it all up, put in new batteries and flick the switch and... nothing. The boots turn on but the dress is dark. My disappointment is palpable and I'm convinced I must have wired something wrong.
Thankfully, the guys who were manning the Protospace table were very eager to help check all my wiring to see what went wrong. Even after a few hours of checking they couldn't find anything wrong, so we had to wait for Dan to come in to see if he could figure it out. Dan spent a good few hours on the dress and fixed it! I had already gone home at this point though so it was left at the booth for me to wear on Sunday.
Sunday I arrived, ogled my dress and I couldn't wait until my shift was over so I could wear it. When the time came I was so nervous! This was my first real cosplay and already so much work had gone into it. I got dressed, put my makeup and wig on and went back to the booth to get hooked up to my battery pack and controller. Once again the dress didn't work! I was crushed.
Dan was gone for the day, but our Chief-Geek Dave came to the rescue. After about another hour of fiddling with it, it finally turned on!
We got me ready and I finally headed out. I have never had people stop me for my picture so much in my life. And the looks on people's faces when they recognized me was just amazing. My favourite comment was "You're just like my childhood but brighter!"
I loved this project. I learned a lot, and though there are a number of changes we want to do to make it better, I can't wait to wear it again.

![]()
Dan's Technical Details (Written like a Techie...):
The outfit is designed to be wirelessly syncronized so all the elements of the blouse and individual boots would run the same program, as stand-alone elements. Although being wireless meant three sets of batteries and 3 controllers, it also meant there were no were wires to mess up the visual appeal of the costume.
We used Synapse radio modules for the robust mesh networking it has, but it is unable to drive the precise timing the WS2812-style LEDs require (perhaps the WS2801 / APA0102 would work). We used Arduino Pro Mini modules to do the heavy lifting for the LED animations.
Dress and Boots Schematic:

Rainbow Brite Dress Parts List:
- 1 x 12mm Momentary Push Button
- 1 x Synapse RF200P81
- 1 x Solarbotics Synapse Breakout Board Kit
- 1 x Arduino Pro Mini
- 1 x SPDT Slide Switch
- 1 x 330 Ohm Resistor
Rainbow Brite Boots Parts List:
- 2 x Synapse RF200P81
- 2 x Solarbotics Synapse Breakout Board K it
- 2 x Arduino Pro Mini
- 2 x SPDT Slide Switch
Theory of Operation of the Rainbow Brite Dress:
The user controls the costume using a single momentary push button switch. With each successive activation, the dress is programmed to display different colors and patterns. The Switch is connected to the Synapse Breakout Board. The synapse module SnapPy script processes the button press, increments a counter, and sends that value to the boots via a Multicast RPC call. Once sent, it also sends the same command to the local Arduino Pro Mini via the serial port.
The Arduino Pro Mini uses SoftSerial as a serial port for the Synapse module to send it commands. The commands I send are simple: 1 displays the first pattern, 2-7 cycle colors, 8 displays a rainbow animation, and 9 was reserved for another animation, which we fell short of time, and did not implement. 0 is used to turn the dress off.
WS2812 Addressable LED strips were attached to the Pro Mini via Pin 2. The Pro mini sent the needed data to the strip using the awesome FastLED.io Library.
Theory of Operation or the Rainbow Brite Boots:
Each Boot had a Synapse Module, a Synapse Breakout Board, and a Pro Mini all sandwiched together. Commands are sent from the dress to the boots, thereby making the boots extremely simple. The only control on the boots is a power switch to turn them on and off.
Once a command is received from the dress, the synapse script in the boot sends the message to the Pro Mini. The Arduino Pro Mini then processes very similar code as the dress. Rinse and Repeat for the second boot.
Power was a concern for this projects as Lyn "Want to BLIND PEOPLE with her Rainbow-briteness!", so running these strips "throttled-down" was not an option. Usually, we'd reach for some Lipoly cells, but we had a distinct lack of them on-hand at that moment.
Each boot ran approximately 3M of LED strips (72 LEDs per meter), with the dress taking approximately 4M. We ran the dress on two sets of 4xAA Duracell battery packs, and each boot featured a pair of 3xAA battery packs. Although the boots ran fine at the lower 4.5V, we wanted the dress portion to POP, so it was ran at closer to 5.5~6V. This gave us a battery run time of approximately 40 minutes in full dazzle mode. Battery swaps showed very high discharge rates, as the cells were almost too hot to handle. Better batteries will be re-introduced!
Here is Dan talking about the project:
MORE POSTS
Tech Tip: Micro Terminal Blocks
We use many, many devices with 0.1" spaced holes, which are pretty much an electronics design standard. We're finding these 0.1" space terminal blocks incredibly useful for making solid, secure, yet serviceable connections to the rest of our designs. We'll often reach for a microcontroller board, then reach for a necessary handful of these parts […]
Project: APA102-2020 MicroNova Custom LE...
I created this choker as a project to demonstrate the new MicroNova APA102-2020 LED strips. Photo by Yeti, edited by Batgirl These addressable LEDs are extremely small, less than 1/4 the size of a standard 5050 LED. This project was built using engineering sample standard MicroNova 99 LED / meter strips . The MicroNova strips we […]
APA102-2020 MicroNova Custom LED Choker
I created this choker as a project to demonstrate the new MicroNova APA102-2020 LED strips. Photo by Yeti, edited by Batgirl These addressable LEDs are extremely small, less than 1/4 the size of a standard 5050 LED. This project was built using engineering sample standard MicroNova 99 LED / meter strips . The MicroNova strips we are selling have 198/meter - […]

Solarbotics has been operating for more than 25 years, bringing electronics know-how and supplies to both the electronics professional and hobbyist. We'll be happy to help you too!
Solarbotics, Ltd. is not responsible for misprints or errors on product prices or information. For more information, please see our Terms and Conditions.
Warning: This product contains chemicals known to the State of California to cause cancer and birth defects or other reproductive harm.
Please visit www.P65Warnings.ca.gov for more information. This item was manufactured prior to August 31, 2018.