No products in the cart.
Introduction: Bare-bones Essentials for the Beginners
What’s it all about? Here are the key take-away points:
- 3D Printing is essentially a hot-glue gun on a precision movement table.
- Instead of glue sticks, it melts plastic filament (similar to fishing or trimmer line).
- 3D printing is not as simple as making toast. It is more akin to making pie, with several steps and pitfalls to avoid.
- There are 3 software steps before you start making the 3D printer get to work:
- Creating the model. This is akin to using MS Word to start writing a document
- Simplify the model for the slicing software. This is akin to making a PDF or screenshot to share with somebody else that just needs to see what you’ve done.
- Slice the model into layers the 3D printer can print. This is like printing the PDF by sending it to a printer driver which tells your printer how to turn toner & paper into a real document.
- It can be slow! It’s important to manage expectations!
- Prints take usually a minimum of 20 minutes. The machine needs to heat up, print, then cool down before releasing the model.
- Large jobs can take in excess of 20 hours to print! Administration usually does not want 3d printers to be left running unattended or overnight!
- Test ambitious prints first by doing miniatures before committing time and material to large models (very simple to do during “slicing”).
- 3D printers require some maintenance. Extruders will need de-clogging, the bed will require cleaning & preparation, and filament will need proper storage. Do not expect this to be entirely plug-in-and-go!
Material (Filament) :
PLA – “Polylactic Acid”
- Derived from corn starch or sugar cane (“bioplastics”).
- Most popular of the 3D printable plastics.
- Good combination of strength & stiffness, comes in many colors and flavours (glow-in-the-dark, sparkles).
- Smells like singed sugar cookies, benign fumes.
- Technically biodegradable in appropriate conditions (honestly – NOPE. Treat like any other plastic).
- When it breaks, is often “brittle” (not much flexing before breaking).
- Temperature resistance somewhat low, will start to deform at around 50°C.
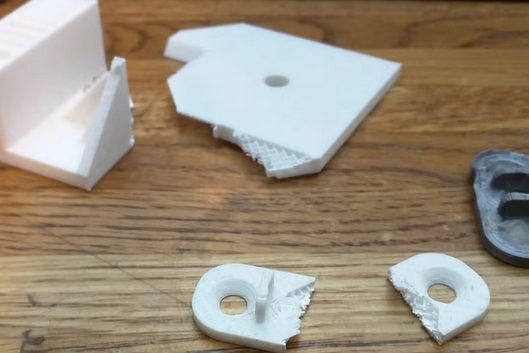
Img source: SSChicken via Reddit
There are other materials that can be used for 3D printing with different physical properties. Typically these are harder to print with or have drawbacks that make them not ideal for an educational setting but can have advantages such as higher temperature resistance, flexibility, impact resistance, etc.
Step 1: Creating Models
3D models are created, downloaded, or converted from existing assets. We recommend the following two tools as your “go-to” software to get started with.
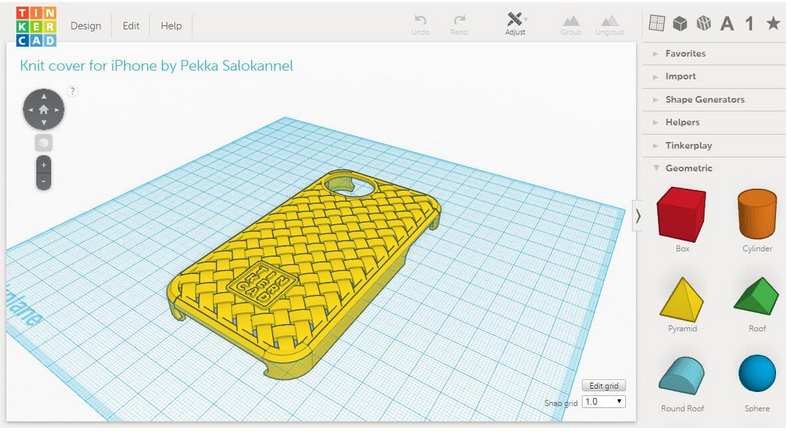
TinkerCAD
- Great introductory and educational tool recommended for all ages.
- Boolean / Platonic solids modeling (drag/drop primitives, subtract/merge together) in a 3D environment.
- Quick, rewarding tutorials for students.
- Web-based application requiring minimal computing hardware (network connection required).
- Educational tie-ins:
- Teachers can create class groups to add co-teachers, activities, and provide feedback on student work.
- Excellent free lesson plan ideas available.
Fusion 360
- Much more advanced and powerful compared to TinkerCad.
- Both owned by Autodesk, TinkerCad designs can be exported for editing in Fusion 360 as a bridge between the two programs.
- Parametric modeling (shapes defined by math/dimensions + solids) drawn in 2D and extruded to be viewed in 3D.
- Recommended for more advanced programs (grade 7 and up).
- Some schools have site licenses, individual educational licenses available for free – validation required.
- 3D strength / flex simulations allows part to be tested before printing.

Minecraft & 3D Games
- Several free model extraction tools to take world-coordinates out and turn them into usable 3D models.
- “Design Mode” now offers an easy export process.
- Practically all 3D games have assets that can be extracted into usable forms.
External Resources
Many free model & design repositories are online, including:
Models found here are great for showing off and ‘playing’ with the machines but offer limited educational value. Teachers may be able to find useful visual aids (fraction wheels, atom structures, organs, etc) however!
Youtube Channels of Note
These are channels that we’ve found to relate useful “fluff-free” information:
- CNC Kitchen – Performs analytical tests on printers, filament, and techniques.
- Maker’s Muse – Monitors newer printing techniques & technologies.
- Teaching Tech – Excellent “How-to” tutorials.
Step 2: Simplify The Model
We need to simplify the model so the “slicing” software (the software that does the real 3D-printer control magic) can understand your 3D model. The slicer doesn’t need to know the full details of your model to process it, much like you do not send the MS Word file when a screenshot is all that’s being asked for.
Let’s go over the 3 types of files you will work with.
The SMART model – Your SOURCE document
- Created by software that contains the definitions of a 3D shape. Much like how a Word document or Spreadsheet file contains all the smarts that make it a useful file.
- If you can copy the design file to another PC, open it, and edit it like you were doing on the original PC, it is SMART.
- Zooming in close to smart model does not result in losing accuracy as the model is mathematically defined. Think of it similarly as to when you zoom into a screenshot of a DOCX file. In Word, it’s still crisp, and is still a text character. In the screenshot, it starts getting pixelated and no longer represents a text character.
- SKP, DWG, F3D, 3DM, ASM, SLDPRT are common “smart” 3D file extensions.
The Simplified Model
- The simple model is a REPRESENTATION of the SMART model.
- This allows it to be easily opened by other programs that may not have the ability to understand the SMART files, nor need to.
- The SIMPLE model file is exported by the SMART model design software.
- Contains the essentials to describe a 3D model to a degree of precision that it is sufficient.
- Data is a mesh, a giant list of triangles described 3D points in space.
- Many tiny triangles can sufficiently describe a sphere.
- When zoomed up to model, you can see the described triangle facets.
- It is technically possible to modify and edit but it can be time consuming and tricky.
- Many CAD programs can turn these simple files into SMART files automagically, but they no longer have the original “Smarts”.
- STL, 3MF, OBJ are common “simple” file extensions.
- When in doubt – export to “STL” (the Grand-daddy 3D export format).
EXAMPLE STL FILE CONTENT – Just a list of coordinates in 3D-space:
cone
   facet normal -7.410078e-002 1.848268e-001 -9.799735e-001
      outer loop
         vertex 2.522630e+001 0.000000e+000 2.899359e+001
         vertex 2.575811e+001 5.000000e+001 3.837854e+001
         vertex 2.545188e+001 0.000000e+000 2.897440e+001
      endloop
   endfacet
   facet normal -9.258143e-002 1.848268e-001 -9.784006e-001
      outer loop
         vertex 2.545188e+001 0.000000e+000 2.897440e+001
         vertex 2.575811e+001 5.000000e+001 3.837854e+001
         vertex 2.651378e+001 5.000000e+001 3.831422e+001
      endloop
   endfacet
Step 3: Slice the Model
- Where the magic happens.
- Slicer imports the SIMPLE model, and based on your needs, creates the commands for your specific 3D printer.
- Very good slicer software is often free (Ultimaker Cura is highly recommended).
- 3D-printer specific options are set here:
- Machine settings.
- Filament type.
- Printing speed.
- Printing temperatures.
- Support & special instructions.
- Is a plain text file, using industry-standard “G-CODE” descriptions to tell machine how to move.
- G-CODE is also used in CNC mills and laser cutters.
;Sample G-Code output file
;FLAVOR:Marlin
;TIME:7835
;Filament used: 7.31067m
;Layer height: 0.28
;MINX:66.115
;MINY:73.516
;MINZ:0.28
;MAXX:149.887
;MAXY:146.485
;MAXZ:50.12
;Generated with Cura_SteamEngine 4.12.1
M140 S80
M105
M190 S80
M104 S245
M105
M109 S245
M82 ;absolute extrusion mode
; Ender 3 Custom Start G-code
G92 E0 ; Reset Extruder
G28 ; Home all axes
G1 Z2.0 F3000 ; Move Z Axis up little to prevent scratching of Heat Bed
G1 X0.1 Y20 Z0.3 F5000.0 ; Move to start position
G1 X0.1 Y200.0 Z0.3 F1500.0 E15 ; Draw the first line
G1 X0.4 Y200.0 Z0.3 F5000.0 ; Move to side a little
G1 X0.4 Y20 Z0.3 F1500.0 E30 ; Draw the second line
Working with TinkerCad
We will be focusing on TinkerCad for this training as it will be the easiest to pick up and can be used by a wide range of ages and experience levels.
- Login using your GMAIL / or educator’s account (if applicable).
- TinkerCAD keyboard shortcuts & printable help sheets.
- We strongly recommend a mouse for CAD design. iPads? Just…no. Possible, but painful.
- Need to know commands:
- T – Transparency – make selected item transparent, so you can see what’s in/under it.
- L – Align – Selected objects will have solid “dots” showing how they can be aligned. Hover over the dot to preview the alignment.
If you need to “Align THIS to THAT”, select the “THAT” item after pressing “L”. - D – Drop – Any item you have “in the air” can be dropped to the workplane surface so it’s sitting flush upon it.
- SHIFT (dragging node) – Constrains resizing to be uniform in X/Y/Z.
- SHIFT (moving object) – Constrains to X / Y / Z directions only.
- CTRL-L – Lock – Anchor the item so it cannot be edited.
- F – Focus – Zooms view to focus on the selected item.
- H & S – Hole & Solid – Convert selected items from hole to solid and back.
- R – Ruler – For precise positioning – play with it!
- Rotation Icon – Dragging inside rosette is 22.5° increments. Outside rosette is smooth.
- T – Transparency – make selected item transparent, so you can see what’s in/under it.
- Macbook touchpad tips (still refining):
- Zoom: 2 Finger (2F) vertical swipe.
- Pan: SHIFT + 2F swipe.
- Orbit: 2F CLICK + drag.
- Need to know commands:
- RUN THE TUTORIALS! EASY!
First Project: Coffee Cup!
- Insert Cylinder, 40 round x 40mm (or taller, you crazy rebel).
- Insert Cylinder HOLE (zebra striped), 36 x 35mm tall (or 5mm shorter than crazy-rebel-you selected).
- Align TOP.
- Align Center/Center.
- GROUP (ctrl-G).
- Insert a handle (Green Torus/doughnut).
- Align Center.
- Rotate 90°.
- UNGROUP (ctrl-shft-G) cup.
- Select all, GROUP.
- Save name (lower left corner, add student name).
- Bonus Special task: ADD YOUR NAME. Not as easy as it sounds; there’s Youtube tutorials.
- Export (Top Right Corner), select STL.
- Save to location where CURA can access it (Cloud Drive).
- Save to location where CURA can access it (Cloud Drive).
Working With Slicer (Ultimaker CURA)
Note: This section is not applicable to the Creality K1 and K1 Max, please follow the guide inside the printer’s page here.
- Load Cura.
- First time configuration:
- General: Change Currency to “$” from “€” (Preferences / General / 2nd item):
- Printers: Select your printer from “Creality3D” list (Preferences / Printers / “Add New” / “Add a non-networked Printer”
If your Cura is NOT up to date for the latest models, here’s the work-around:
K1 & K1 Max – Follow the guide on the K1 and K1 Max printer page. Once finished, skip to “Frequently used special settings” below.
Ender-3 S1 Pro – Select “Creality Ender-3 S1” (and rename it). No real functional difference.
Ender-6 – Select “Creality Ender-5 Plus” (and rename it).
Change Printer X(Width) to 260, Y(Depth) to 260 and Z(Height) to 400.
Materials: We are going to use the excellent CURA defaults, with some minor tweaks. Doing this will give you 4 very handy presets not available under “eSun” filament selections. To do so, you must to duplicate the default “Generic PLA”, rename it, then save it as a favorite.- Find the “Generic PLA” and duplicate it from the top right-side hamburger menu.
- The duplicated on will show up as italics. Change the default temperature from the default (too low) 200 to 210°C.
- On the “Information” Tab,
- Rename it to “PLA – School” and toggle the Star (makes it an easy-to-find favorite).
- Put in a filament cost of ~$27 (approximate cost for PLA filament for Schools).
- Put in a filament weight of 1000g.
- Exit the Preferences menu.
- Find the “Generic PLA” and duplicate it from the top right-side hamburger menu.
- General: Change Currency to “$” from “€” (Preferences / General / 2nd item):
- Open / Drag STL model onto plate.
- Rotate model to orient “most flat” using Rotate / Select Fact to align to Build Plate.
- Slice the model, and note how long it thinks it will take to print (bottom right corner).
- RESCALE Model, then slice. Compare the new printing time.
- Select Print Profile
- This is where the filament modification above comes into play. Select the “Standard Quality” slider on the top menu. This will pop down the presets menu which are excellent starting points. Do focus on using “Standard” and “Low Quality” the most!
- Thinner layers = more time! Standard 0.20mm is fine for most printing but it can be modified anywhere between 0.10mm and 0.32mm.
- Frequently Used Special settings
- Infill – how densely filled is it with plastic.
- 10%~40%. 20% is good place to start.
- Denser = Longer to print, uses more filament. Necessary only for more strength.
- Grid patterns – Grid is standard, but old. “Cubic” is best “go-to”. Gyroid is fun.
- Walls & Top/Bottom – how many “outlines” are used to build the outer/inner surfaces.
- 2 is minimum, more HUGELY assist part strength.
- Material – Over-ride printing temperatures here.
- Support – Turn on to hold up parts printed in mid-air, or too steep. Temporary structure to be broken off after print:
- Infill – how densely filled is it with plastic.
- This is where the filament modification above comes into play. Select the “Standard Quality” slider on the top menu. This will pop down the presets menu which are excellent starting points. Do focus on using “Standard” and “Low Quality” the most!
- “Slice” to create GCODE file and enable “Preview” window that shows printer actions.
- PAY ATTENTION to summary!
- PAY ATTENTION to summary!
- Save to disk / removable drive (if inserted).
3D Printing safety
Now we have our model made, before we interact with the printer there are some important safety considerations to learn about first.
General Considerations:
- Never keep the printer running while unattended for long periods of time (like overnight)
- Keep the printer on a stable surface while powered on or in operation
- Have plenty of room around the printer free of any potential snags (like curtains) and flammable materials
- When processing finished prints such as removing stuck on supports with tools, it is recommended to wear safety glasses and other appropriate PPE for the task
Thermal Safety:
3D printers typically have 2 heating elements, one on the hotend for the nozzle to melt plastic and one on the bed to give the plastic a nice, sticky place to stay.
The fire risk is incredibly low but not zero. We consider modern 3D printers equivalent to a toaster in terms of fire hazard.
- Have nearby or know where the nearest fire extinguisher is in case of an emergency
- If the printer is being put in a side or spare room, ensure there is a working smoke detector in that room
- Although it is difficult to intentionally touch the nozzle during printing, fingers should stay away from the nozzle at all times
- Most printing is near 220°C, but may be as high as 300°C on some printers
- If necessary, use tools such as snips or pliers to remove excess filament that may leak before prints
- The print bed typically operates at 60°C but can be as hot as 80°C
- 60°C is right on the boundary of safe to handle temperatures, we recommend letting the bed cool to below 45°C before handling or wearing gloves
- All machines come with thermal runaway protection that will cut power if either heating system behaves unexpectedly, and will display an error on the screen
- If this happens, contact Solarbotics before powering up or using the machine again
Mechanical Safety:
The movement system of a printer is primarily accomplished via a series of belts, gears, pulleys, sliders, rails, wheels, and threaded rods. All of these are potential pinch points for things like clothing, hair, head coverings, and fingers. 3D printers use an open loop control system that allows for accurate positioning but cannot tell if the movement was obstructed and will not stop automatically if there is a collision or object (such as a hand) in the way. All printers at present use stepper-motors for motion, which can be safely stalled out without damaging the motor. In an emergency, powering off the printer will make the stepper motors easily moveable.
- When working on or demonstrating the printer by moving its axis(s) manually by hand, turn off power to the machine first.
- Have students wear appropriate clothing that will minimize the chance of being snagged similar to what would be required in a woodworking or auto shop class
- If your printer has an enclosure, keep the door closed during operation
Electrical Safety:
- Your printer runs off an enclosed low-voltage 24V DC power supply to drive the electronics, motors, and heating elements
- Each machine has a frame that is grounded and the power input fused
- Occasionally check the wires that move when the machine is in operation for wear and damage, such as the hot-end and bed cables
- Never keep the machine connected to mains power when removing panels from the printer
When in doubt if you have safety questions or concerns, contact Solarbotics for support or questions.
Basic 3D Printer Interaction
As each printer is a little bit different in terms of operation and it’s interface, please follow the appropriate link below to learn more about your machine:
Trouble-Shooting
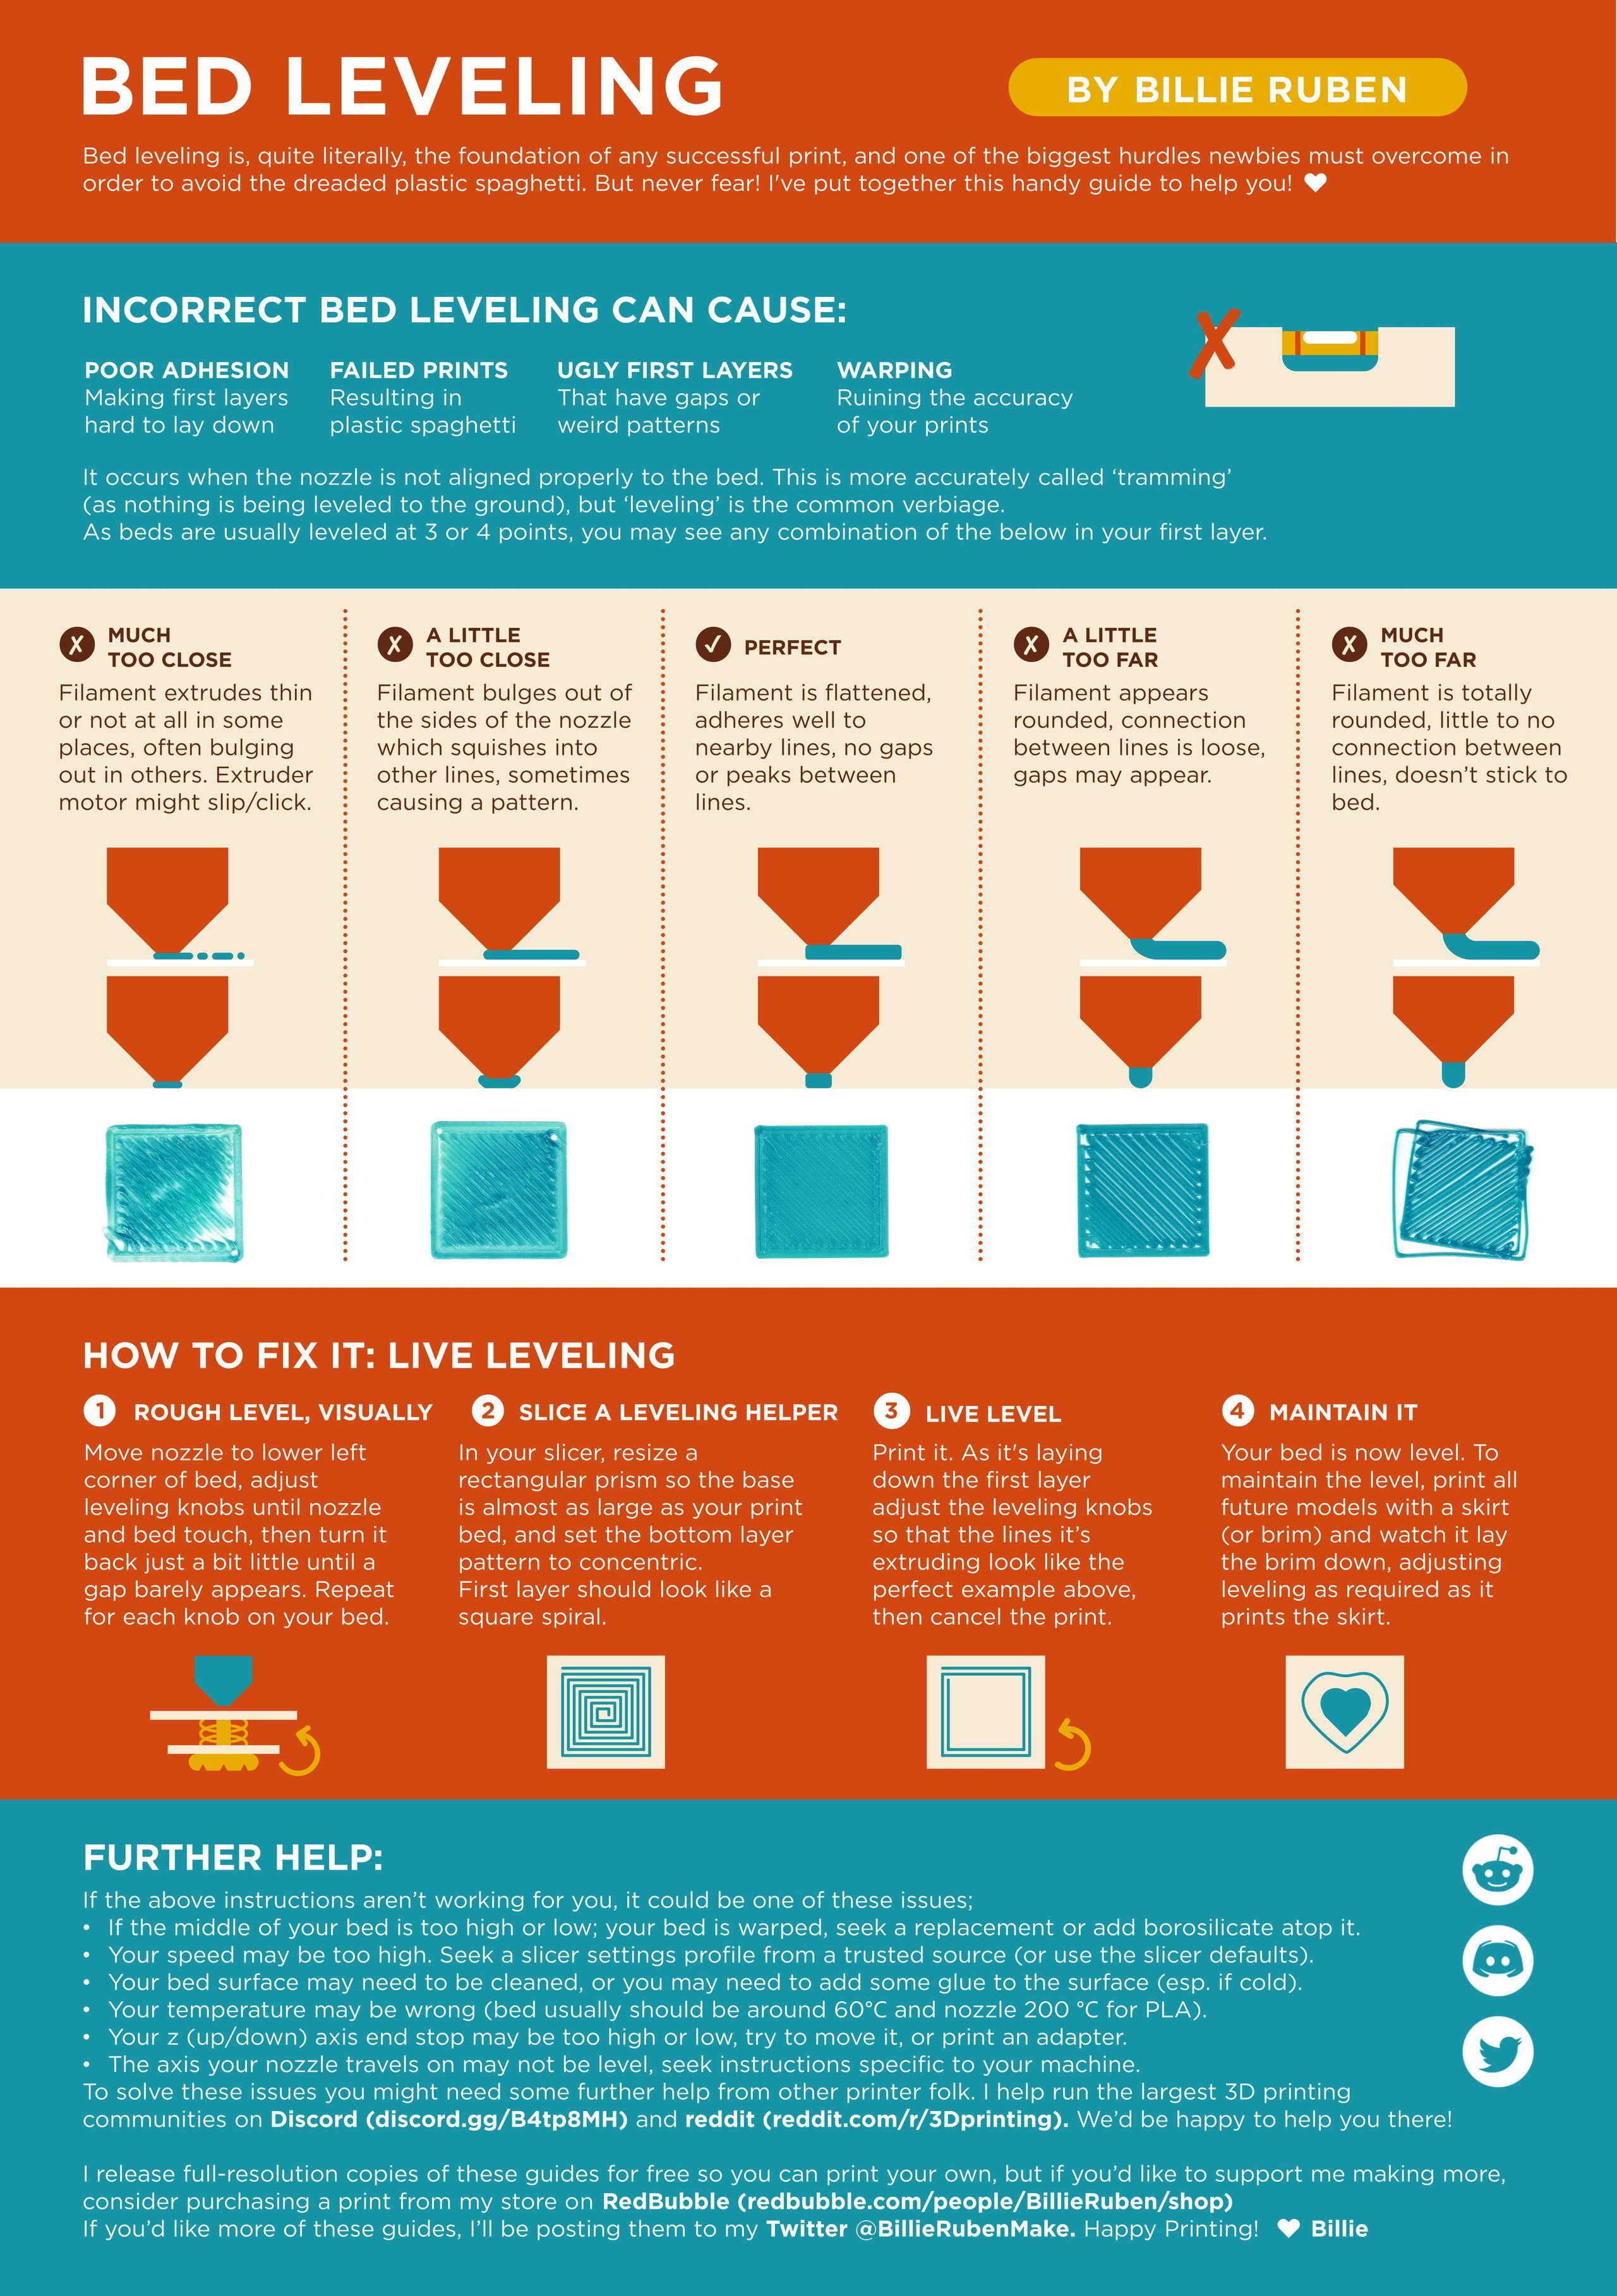
- Bed adhesion (Stuff pops loose, or first layer doesn’t stick)
- Adjust first layer either during
- Bed leveling (manual gap with leveling knobs)
- Control panel (“Adjust Z-depth)
- Worn out surface
- This is an issue with plastic-textured surfaces. They can wear down
- Improper bed / filament temperature. ABS/PLA requires much more heat than PLA to stick
- When in doubt, use magical, mystical stick of gluing
- Unclean surface
- Only an issue if bed surface contaminated with skin oil or other non-printing contaminants
- Clean with HOT HOT water or as a final resort Isopropyl spray bottle
- Do NOT use paper towel on surface. If rubbing required, use DISPOSABLE COFFEE FILTERS
- Adjust first layer either during
- Print stop midway
- Clogged nozzle
- Preheat extruder, remove filament. Use included pin in tool kit to reverse-purge (from bottom) nozzle. If still troublesome, replace nozzle with included nozzle & wrench in tool kit. Retract filament from hot-end. Does it have “divots”? The pusher (extruder) is grinding away the plastic trying to push it into a blockage down the chain.
- Preheat extruder, remove filament. Use included pin in tool kit to reverse-purge (from bottom) nozzle. If still troublesome, replace nozzle with included nozzle & wrench in tool kit. Retract filament from hot-end. Does it have “divots”? The pusher (extruder) is grinding away the plastic trying to push it into a blockage down the chain.
- Extruder Failure
- Is the motor that actually moves the filament too hot to touch? Motor may be failing
- Inspect plastic parts on the extruder for cracks (was a common failure on older models)
- Is the extruder hob (little gear that actually grips the filament) loose? There is a tiny screw that locks it on, and if it lets go, it will spin free.
- Clogged nozzle
- Poor prints
- There is a veritable plethora of causes to this. There are many, many excellent trouble-shooting resources to this (list upcoming). Our short list of things to check include the following.
- Avoid cheap filament! Not necessarily inexpensive, but poor quality. Poor filaments often exhibit:
- Inconsistent chemistry
- Inconsistent diameter
- Embedded moisture (causes tiny steam bubbles to pop when extruding)
- Double-check the chemistry you are printing (read the filament spool label). Printing ABS with a PLA profile will work, but result in a terrible print.
- When in doubt, slow down the printing speed, and up the hot-end temperature. Cold plastic prints much worse than too-hot plastic.
- Stringy prints (lots of spider-web) indicates hot-end is too hot, or the cooling fan is set too low.
- An excellent set of 3D printing troubleshooting check-lists. by Bille Ruben (who helps runs the largest 3D printing community on Discord & Reddit) is well worth reviewing.