Here's a little makeover of an inexpensive aftermarket heated car seat heating pad that stopped working. Designed to activate and warm up when sat upon, the electronics face a fair amount of abuse: since the seat is a soft frame, the wires inside constantly move and flex with the body. They are also subject to […]

Project: LED Earrings
Solar botics
August 8, 2017
The idea of adorning oneself with glowing bits has been around forever, but instead of smearing ourselves with phosphorescent jellyfish or placing fireflies in ears like some uncivilized cavemen we went for simple LED earrings. We made a build that involves a simple slow-scroll RGB LED and a few reflective bits to bounce that pretty light around for a shiny ear decoration. It is powered by a lightweight coin cell battery integrated into the design eliminating the need for wires. In order to conceal it, we used this brilliant idea by Idunn Goddess to utilize plastic googly eyes that can be found at any dollar store. The benefit of this method is that the battery can be removed and/or replaced once it is worn out or you want a break from being shiny allowing for more than one-time use.
Supplies needed:
2 slow scroll RGB LEDs
2 googly eyes that fit the battery well - we used 2cm diameter eyes
2 coin cell batteries that fit inside the eye - in this case 3V ECR1616
2 earring hooks
Crazy glue
Scissors or exacto knife
Needle
Drill press with metric M5 drill bit or hand drill
Something to diffuse the light - we used plastic crystals from, you guessed right, Dollarama
Steps:
Googly eye prep:
- Cut an opening that will fit your chosen battery's diameter and take out the circular bit that was pretending to be a pupil or an iris. You won't need that fake, lying piece of plastic ever again.
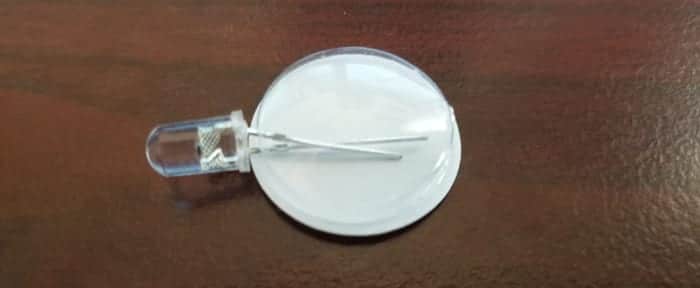 - Poke 2 holes for LED legs with the LED legs on the opposite side of the battery slot. They eventually will become one hole, but that is not important.
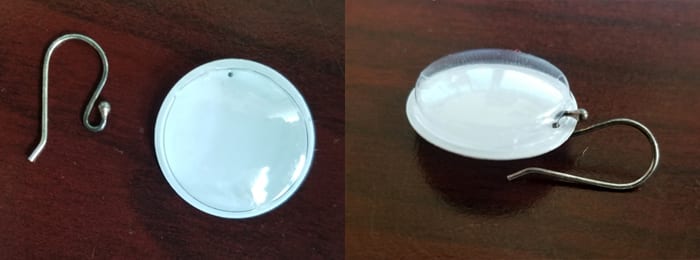 - Poke a hole in the googly eye backing next to the battery opening and thread the earring hook through.
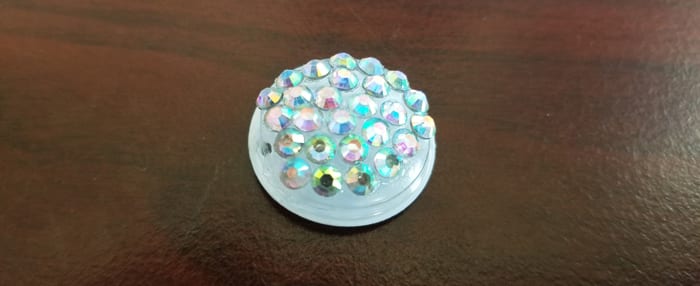 - Embellish and/or paint the front of the googly eye to conceal the battery. We glued some flatback rhinestones for added shine. No one needs to see the inner workings of this earring - it should glow by magic only.
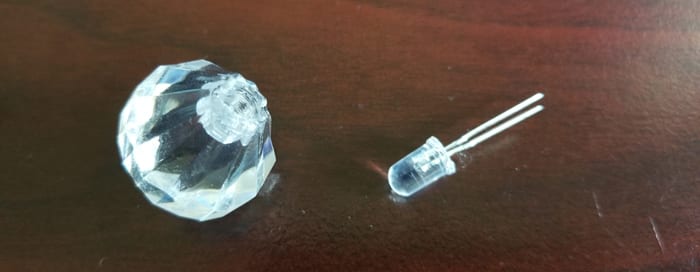
 - Drill the hole of the right diameter to fit the LED dome in the plastic crystal and glue the LED into the diffuser. In the above photo, the opening for the LED wasn't deep enough. We were lazy. But that doesn't prevent the light from bouncing around the chandelier nicely, as you will see in a bit.
Final assembly:
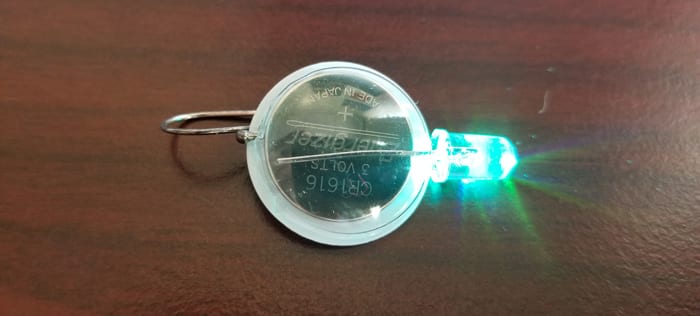 - Insert the battery and the LED as shown. If the polarity is correct, your LED will light up. You can carefully glue the base of the LED to the battery container. Or you can do it recklessly and then you will have an ocean of crazy glue solidify over the battery making it impossible to replace.
 - As an option, you can sandwich two coin cells for added brightness and longevity. They still fit into the holder just fine.
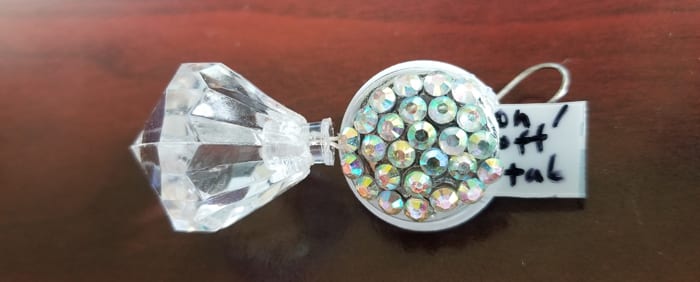 Tip: If you are not fond of fishing a slippery coin cell out of the holder every time you want the LED off, you can cut out a small plastic tab to place between the LED leg and the battery. This will create a break in the circuit and preserve battery life. Talk about energy saving.
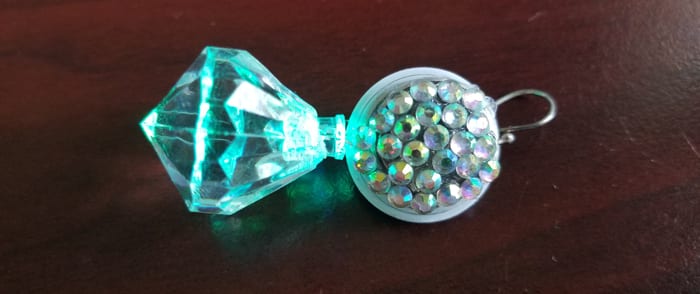 - Final look.
MORE POSTS
Thursday Cool Links
Well, it looks like we somehow managed to walk away from the Maker Faire unscathed. Going to the beach afterwards, though, has left us with some residual sunburns to suffer through. Thankfully, we got to return to some local weather that is wet, grey, and generally miserable. But enough of that! On with some neat-o […]
Survey! Prizes!
We have developed a quick little survey to help us find out a few things from our visitors, and we hope you won't mind giving us your thoughts. In exchange for a little bit of your time, we will be entering your name into a draw for our newest product up on deck -- the […]
Pogo Pins are back!
After a long hiatus, our PP3 chisel-tip pogo pins are back! And it looks like they're here to stay, so no more drop-outs in supply. I know that we use them for robotics applications, but there's a lot of people using them for other electronics purposes. Now you can get them reliably, and in quantity, […]
Solarbotics has been operating for more than 25 years, bringing electronics know-how and supplies to both the electronics professional and hobbyist. We'll be happy to help you too!
Solarbotics, Ltd. is not responsible for misprints or errors on product prices or information. For more information, please see our Terms and Conditions.
Warning: This product contains chemicals known to the State of California to cause cancer and birth defects or other reproductive harm.
Please visit www.P65Warnings.ca.gov for more information. This item was manufactured prior to August 31, 2018.