We're saving you some hassle and money by now offering our popular GM2 or GM3 gear motor with a GMPW wheel! Save a few bucks and order them as a set.

Grove Smart Plant Kit Demo
Dilan Tuff-Overes
March 15, 2018
Grove Plant Care Kit is a smart automated solution for making sure the plant stays alive and well. The electronics monitor 4 different parameters necessary for the plant being happy and healthy: humidity, temperature, UV levels, and soil moisture.
From these variables it creates a watering schedule that will keep the plant at its optimal soil moisture levels. It will provide warnings on its display when UV levels are too high or when temperature is out of bounds between it's cold and hot set points. With its built in pump and flow sensor, it can water the plant autonomously down to the milliliter.
These set points can be modified in the code which uses the Arduino environment to suit any plants needs. This kit is very much focused on the DIY maker rather than being an out of the box solution. It will require users to do some coding to optimize the functionality to suit their environments specific climate and the plant's needs. Here is some sample code to start with: Gardening-Code-Grove-Plant-Care-Kit-1.zip
Once dialed in, the Grove Smart Plant Care Kit will happily spend its existence keeping your plants at the perfect moisture levels as long as you remember to keep its water reservoir full.
This project was built in a very short time frame for the Calgary City Teacher's Convention. It reuses the enclosure design from one of our previous projects. You know what they always say, right? Reduce, Reuse, Recycle!
Here is a breakdown of our build as well as the design files so you can make your own. Make sure to program your Arduino before you start this process! This box is meant to care for a small to medium plant and the firmware has been designed as such.
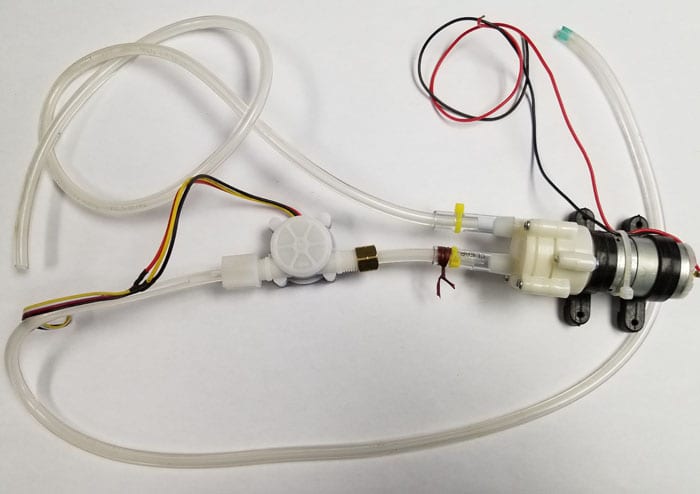
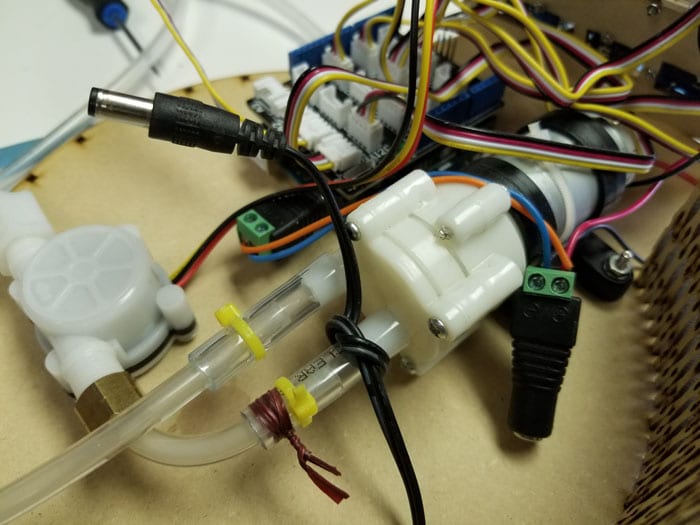
First we start out by attaching clear tubing to the pump and flow meter. Since we are using a custom pump for our build, we recommend that you measure the diameter of tubing you will need that works with your own pump. You will need about 3 feet of flexible PVC tubing, 1.5 feet for each side of the pump, and about 3 inches between the pump and flow meter.
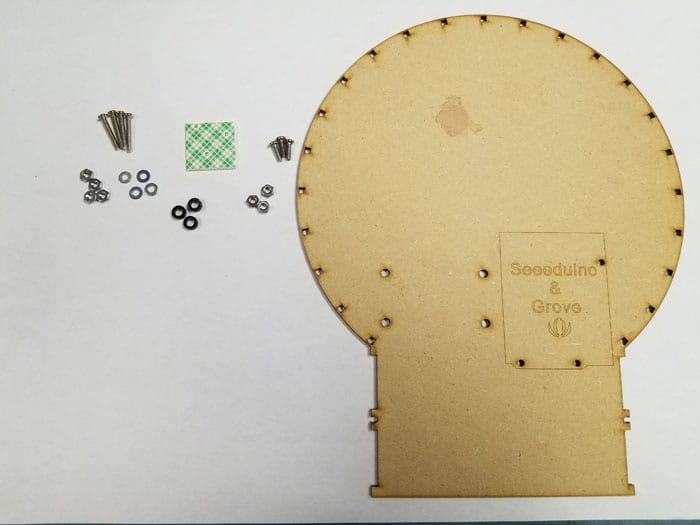
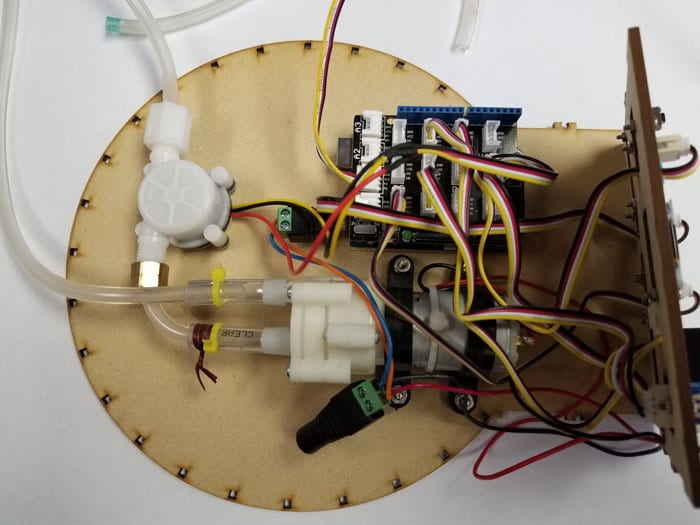
Next, we will mount the pump, flow meter, and Arduino onto the base plate. We have used 3mm tall standoffs to keep the Arduino raised so no pins touch the MDF.
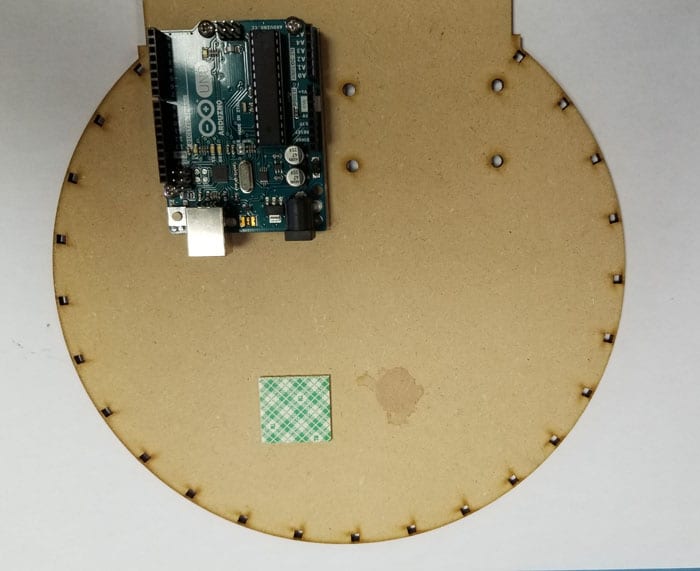
We've placed the double-sided sticky tape here which will hold the flow meter in place.
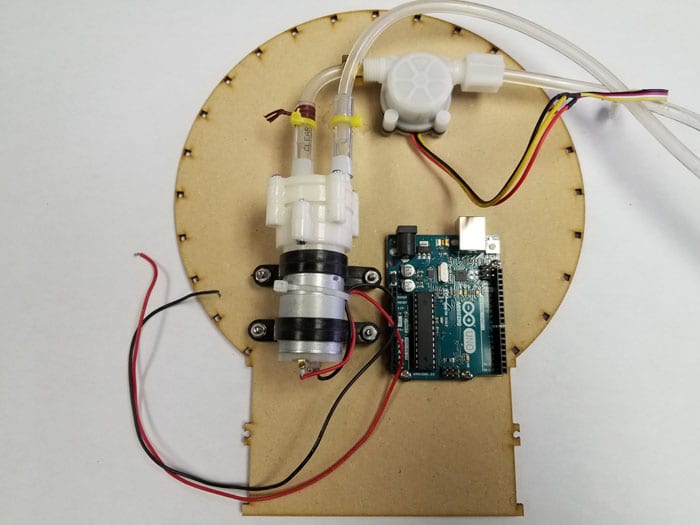
Here is the result once everything is attached to the base plate!
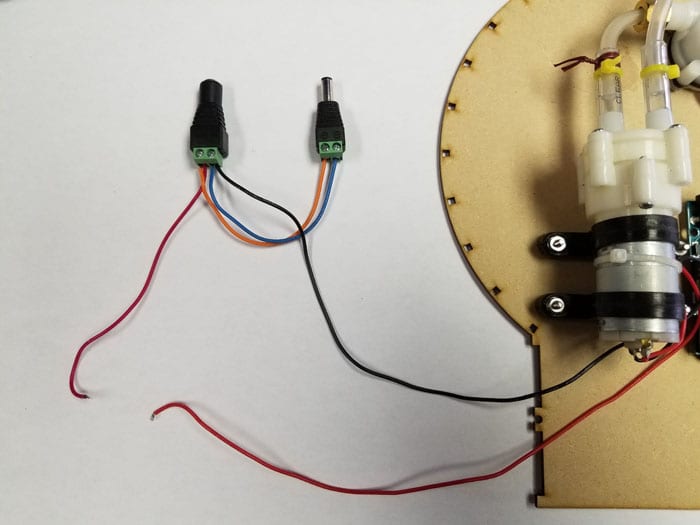
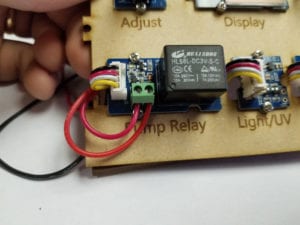
Since we want to run power to both the pump and the Arduino, but also control when the pump is on and off, we use this little wiring harness. The two red wires will be connected to the relay so the Arduino can control when water is fed to the plant.
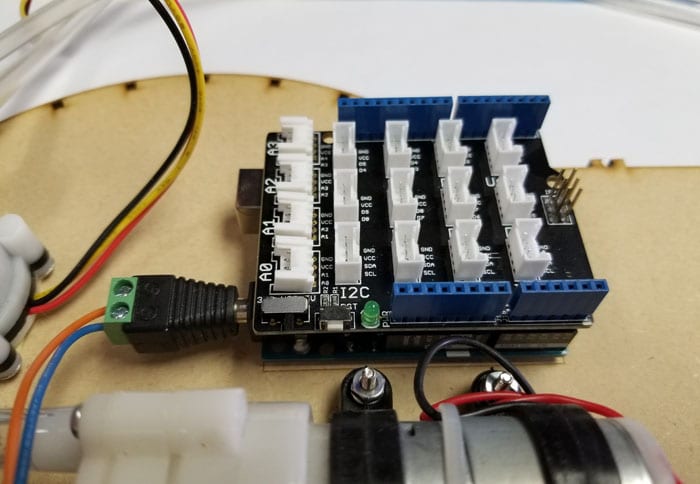
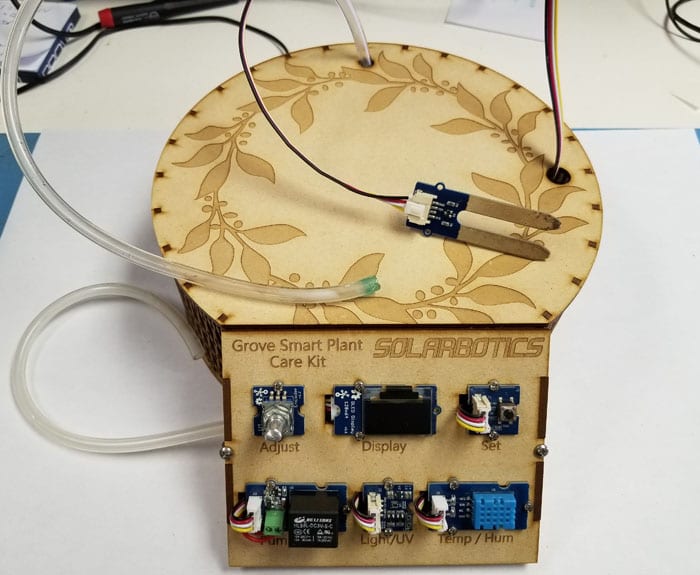
Next we connect the Grove/Arduino shield and power plug to the Arduino. This shield makes it easy for us to connect the host of sensors and controller we use to feed the plant.
| Port | Item |
| I2C_1 (closest to power plug) | Light/UV Sensor |
| I2C_2 | OLED Display |
| D2 | Set Button |
| D3 | Rotary Switch |
| D5 | Flow Meter |
| D6 | Relay |
| A0 | Temperature/Humidity Sensor |
| A1 | Moisture Sensor |
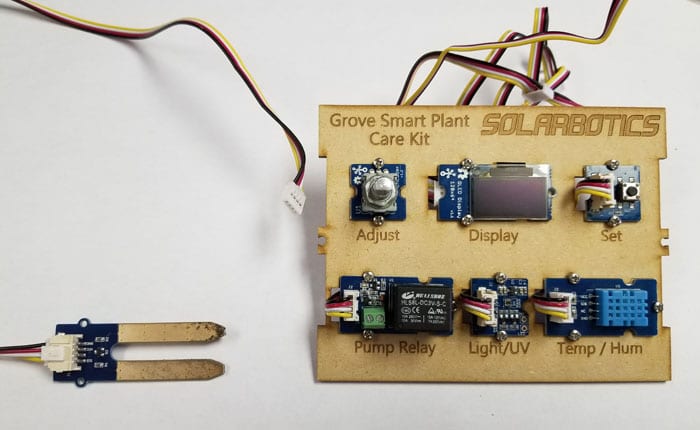
We use some M2 screws and nuts to hold all the sensors in place on the faceplate. We connected the cables first though as the faceplate doesn't allow for them to be connected afterwards.
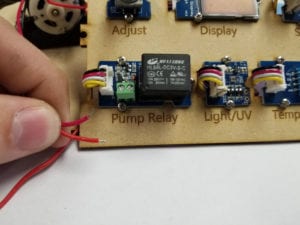
Now that the relay is in place, we can go ahead and connect the pump wires to the screw terminals. Make sure to fish the wires through the hole where the cable is connected.
Once the face plate and relay are ready, we can continue by connecting each of the cables to their designated ports. We can use the table above as reference.
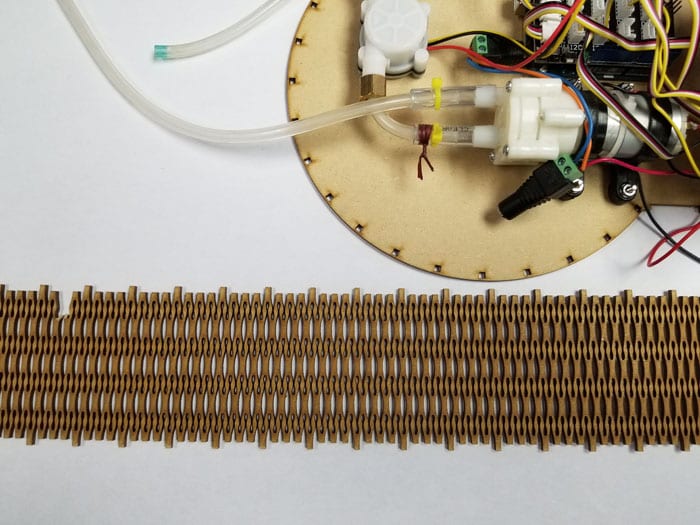
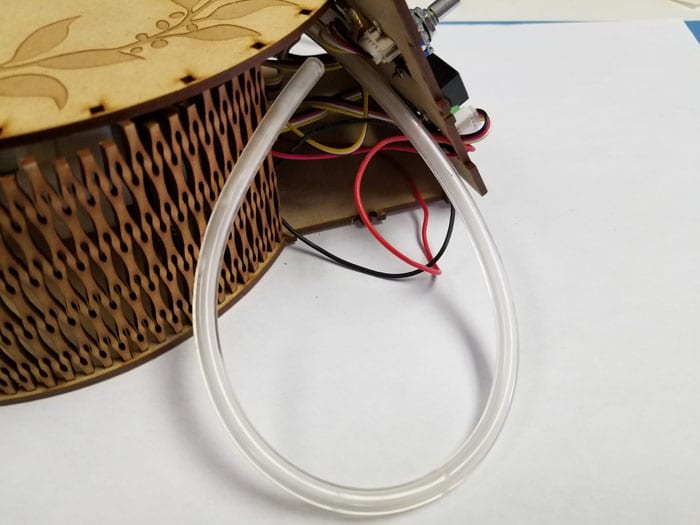
At this point, the guts of the plant care kit are ready, and it is now time to attach the shroud to the base. Each of the small square holes has a corresponding peg on the shroud. We must use care when pushing each peg into the hole as they are fairly delicate.
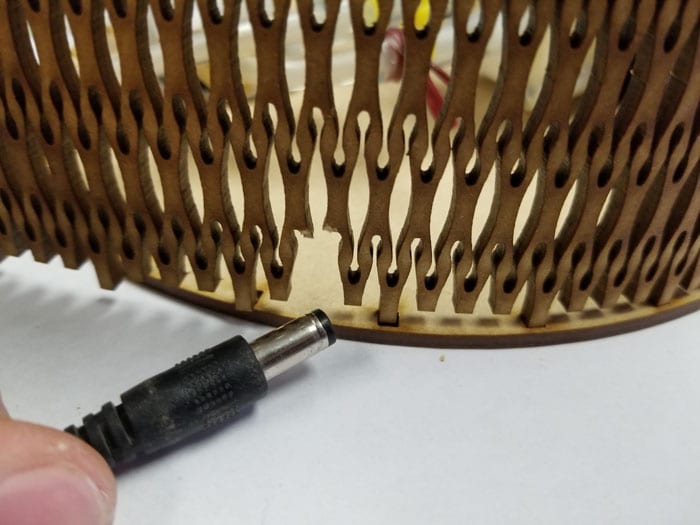
Before we push all of the pegs into their holes, we can break off a piece of the shroud, so that there is room to run the power cable into the back of the box. We can then tie the power cable around the pump to add some strain relief.
Now that the shroud is fully seated in the base, we can add the top plate. We need to repeat the same process as we did for the base, making sure to fish the output water tube and moisture sensor through their respective holes.
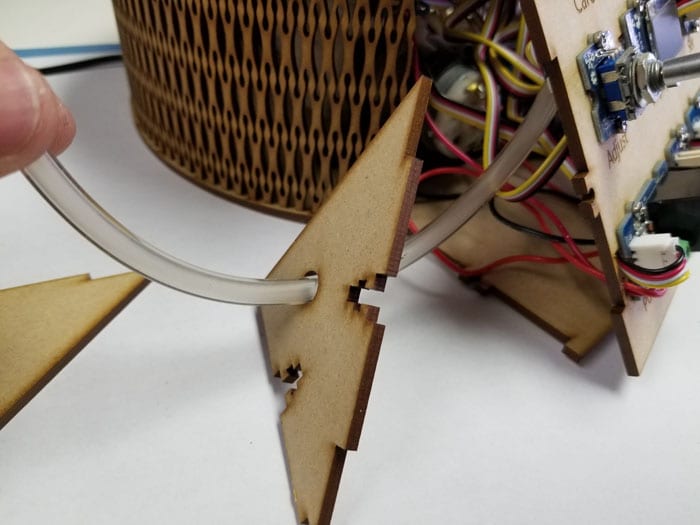
We can also take this opportunity to run the input water tube through the small triangular gap between the shroud and face plate.
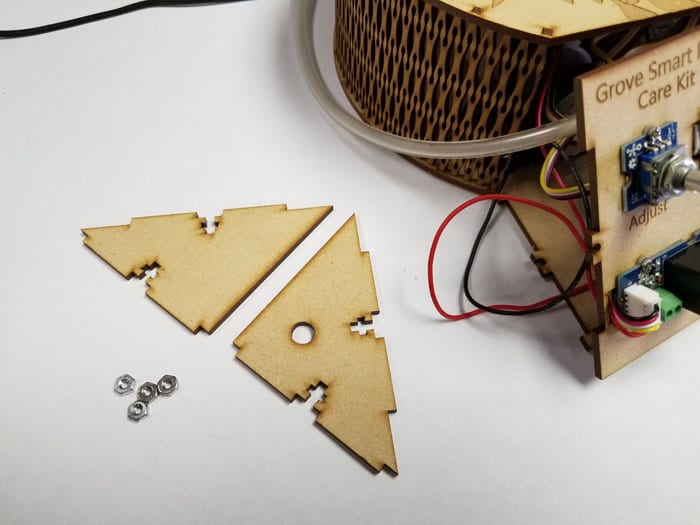
With both the base and top connected, we can add the sides to the face plate. We use the handy t-nut faceting technique to hold everything in place. Make sure to fish the input water hose through the required hole.
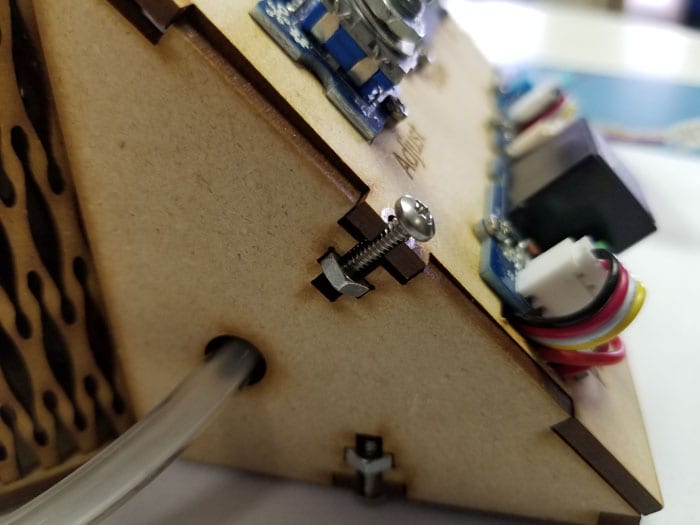
This is what it looks like once everything is tightened.
Now that everything is complete, we can add our plant and start the automatic plant care process!
MORE POSTS
Make was a blast... but now onto the Hol...
Wow, has it been that long already? The MAKEr Faire in Austin was beautiful, and interesting. Funny how we saw many Texans driving along with their windows up, while us two Canadians were wearing shorts with the top down on our rental. Interesting how people adjust to different climates! The MAKEr Faire wasn't quite as […]
Turbot Kit!
It's been a while in the making, with a good many prototypes, but finally here it is: The Solarbotics Turbot Kit This alien-like robot is unlike any other robot you've seen!
Tasty Treats and New Treats, Too
A couple of weeks back we held an open house for Calgary's Protospace group. Many BBQ'd items were consumed, many objects were lazored, and many people seemed to be walking around in a stupor of admiration for all the nifty bits and pieces of equipment we have on hand. We had a good time visiting […]
Solarbotics has been operating for more than 25 years, bringing electronics know-how and supplies to both the electronics professional and hobbyist. We'll be happy to help you too!
Solarbotics, Ltd. is not responsible for misprints or errors on product prices or information. For more information, please see our Terms and Conditions.
Warning: This product contains chemicals known to the State of California to cause cancer and birth defects or other reproductive harm.
Please visit www.P65Warnings.ca.gov for more information. This item was manufactured prior to August 31, 2018.